Colourful DIY Easter Bunny Craft
This Easter bunny craft blog was written by a paid contributor. All photos were taken by the Crafty Lumberjacks.
Spring has sprung, which means it’s time to break out those pastel-colored paints and get crafting! One of the things we knew we wanted to create this year was an outdoor Easter decoration that was both cute and able to stand up to the elements. This beautiful vintage-inspired DIY Easter Bunny craft fit the bill as it’s ridiculously adorable and wonderfully waterproof thanks to the Flex Seal Family of Products. Now, let’s hop into exactly how we brought this earresistable bunny to life!

Materials
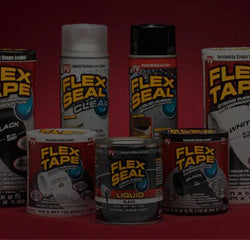
● 1 Flex Paste, Quart, white
● 1 Flex Seal can, clear
● Foam board or cardboard
● Pencil
● Craft knife
● Putty knife
● Plastic fork
● Acrylic paint
● Paint brushes
● Gloves
● Protective eyewear
● Tarp
● Optional: cutting mat
Steps
1. Draw Bunny on Foam Board
Take a pencil and draw an outline of a cartoon-style bunny rabbit on a piece of foam board or cardboard. Avoid small details and keep the image simple for the best outcome. When you’re finished with the silhouette, draw some facial features and a carrot.

Flexpert Tip: Not the best artist? No problem! You can size and print out free bunny clipart to use as a stencil. Simply cut it out, trace it onto the foam board and voila, a beautiful bunny!
2. Cut Out the Bunny
Place your cardboard bunny on top of a cutting mat or safe surface and use a craft knife to cut the outline of the bunny.
Note: Always use caution when working with sharp objects.


3. Prep Bunny and Flex Paste
Now it’s time to bring out the Flex Paste!
Note: Before using Flex Paste, read all directions carefully and make sure to wear gloves, protective eyewear, and work in a well-ventilated area.
Open your jar of Flex Paste and remove the silica gel packet and protective foil (if provided, our new Stay Fresh container doesn't include a silica gel packet.) It’s very important to save both the silica packet and protective foil so you can reseal your Flex Paste once you’ve finished using it.

Flexpert Tip: Place the bunny cut out on wood blocks to raise it off the surface to make it easier to handle while working.
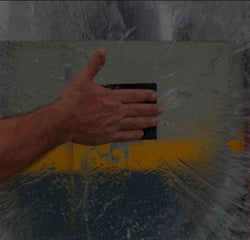
4. Cover Bunny with Flex Paste
Using a putty knife, remove an even layer of Flex Paste from the top surface of the tub and begin to apply it evenly on the top of the bunny and all around the edges.
Similar to frosting a cake, spread generous amounts of paste all around the bunny until the entire surface is covered.

Be sure to work quickly as Flex Paste will begin to cure within 15 minutes of applying.
Flexpert Tip: Do not scoop too deep into the tub. Doing so can create air pockets and your Flex Paste will not save as fresh as possible.
5. Add Fur Texture
Next, you’ll create your bunny’s textured fur with the help of a plastic fork. The best method for achieving this look is to push the tines of the fork into the Flex Paste, dragging and lifting the fork as you go. Work in a continuous motion around the bunny and remember to change the direction of the fur depending on the body part.

Be sure to work quickly, as Flex Paste will begin to cure in the first 15 minutes. Once satisfied, place the bunny in a well-ventilated area to dry for at least 24-48 hours before moving on to the next step. To make this DIY Easter Bunny craft completely weatherproof, wait until it is dry, then add an even layer of Flex Paste to the backside.
Flexpert Tip: If you don’t want to rush this process, you can add Flex Paste to the bunny in sections, but keep in mind you will need to completely reseal your tub of Flex Paste in between sessions to keep it from drying out.
6. Paint Details
Once the Flex Paste is completely dry, use stencil brushes to paint on details with acrylic paint. Add a small amount of paint onto the brush and paint with an up and down motion. This will help get the paint into the textured crevasses.


7. Spray with Flex Seal
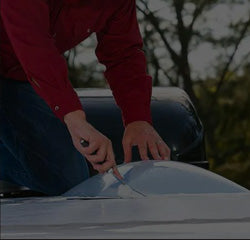
Lastly, it’s time to seal in your vibrant painted features with Flex Seal.
Note: Before using Flex Seal, make sure to read all directions carefully.
In a well-ventilated area, lay a tarp down and place the bunny on top of it. Shake the can of Flex Seal and spray using an even sweeping motion, holding the can 8’’-12’’ away from the surface. Once your bunny is fully coated, allow it to dry for 24-48 hours before displaying.


We’re very hoppy with how this adorable DIY Easter Bunny craft turned out and hope you feel inspired to give this project a try this Easter season.
By Dennis Setteducati and Andrew Boza
HGTV Handmade‘s Crafty Lumberjacks (aka Dennis Setteducati and Andrew Boza) are flannel-loving bloggers and experts in all-things DIY—including holiday decor! They’ve appeared on GMA, LIVE with Kelly & Ryan, The Chew and The Rachael Ray Show and can be seen regularly on the HGTV Handmade YouTube channel getting crafty with their cat.