How To Make DIY Floating Wood Shelves
This DIY floating shelves blog was written by a paid contributor. All photos were taken by Kate Hollingsworth.
I’ve been seeing (and endlessly pinning) stylish floating wood shelves for months, and now that I’m finally giving my front lounge room a refresh, I’ve decided to build some extra-long DIY floating shelves of my own!

Floating shelves are simply shelves without any visible brackets, so they appear to “float” on the wall by themselves. One of the simplest ways to create a floating shelf is to build a skeleton frame, attach it to the wall, and cover it in a skin of timber to hide all the fixings.
Read on, and I’ll show you a step-by-step guide to making your own DIY floating wood shelves!
Materials
● 1 plywood sheet, 2.4m x 1.2m x 12mm, cut lengthways into thirds (for the top of shelves)
● 1 plywood sheet, 2.4m x 1.2m x 4mm, cut lengthways into thirds (for bottom of shelves)
● 9 pine timber boards, 2.4m x 45mm x 45mm (for skeletons)
● 4 dressed pine boards, 2.4m x 62mm x 19mm (for front and sides)
● 2, Flex Glue 10 oz cartridges, white
● Timber screws, 90 mm
● Masonry bolts, 100mm (if attaching to a brick wall) or 100mm timber screws (if connecting to a stud wall)
● Nail gun and finish nails
Steps
1. Assemble Shelf Frames
First, cut your 45mm pine to size and predrill holes (about 45cm apart) along the back frame piece.
Note: The size will vary depending on how long and deep you want your shelves. For reference, I made mine 2.4m long and 40cm deep.

Next, add Flex Glue to one end of each middle support piece. Then, squeeze each middle support piece tightly against the back piece and add a screw through your predrilled hole to join the two.


You should now have a long back piece with short middle pieces glued and screwed along the entire length (about 45cm apart).

2. Attach Frames to Wall
Begin this step by predrilling three holes through the back frame piece (one in the middle and one on either end).
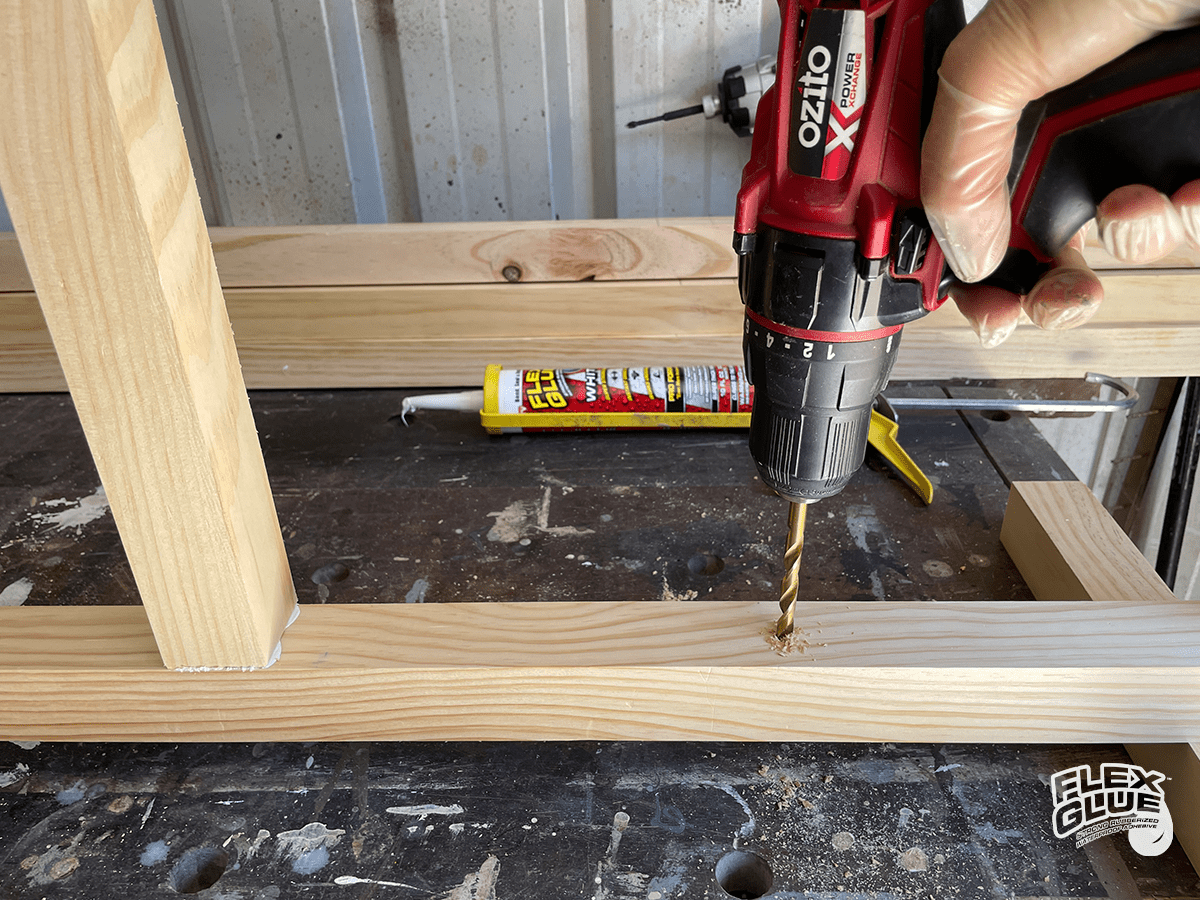
Lift the frame into place and drill through the center hole to mark the wall. I found the easiest way to do this was to draw a line at the center of the wall and line up the center hole with the wall line.
Flexpert Tip: My wall is a brick wall, so I can attach the shelves anywhere. If you’re connecting to a stud wall, use a stud finder and make sure you attach to multiple studs along the wall.

Put the frame down again and predrill a hole where you’ve just marked the wall. (I used a hammer drill because my wall is brick) Vacuum or blow out any dust from the hole.


Once your drill hole is free of debris, lift the frame to the wall and tighten a long bolt through the center of the frame into the hole.

Next, use a spirit level to pivot your frame up or down until it is perfectly level.

Keeping the frame level, predrill through both end holes, and add bolts. Make sure each frame is tightened to the wall with at least three bolts.

Flexpert Tip: Use a clamp if you need help holding the front piece in place while adding screws.


3. Stain Wood
I wanted my DIY floating shelves to be a dark walnut color, so I stained all the plywood and pine trim. Allow the stain or paint to dry completely before continuing to the next step.
Flexpert Tip: Not interested in staining? No problem. Instead, you can paint the shelves or simply leave them the light pine colour; it’s up to you!

4. Cover Skeleton Frame
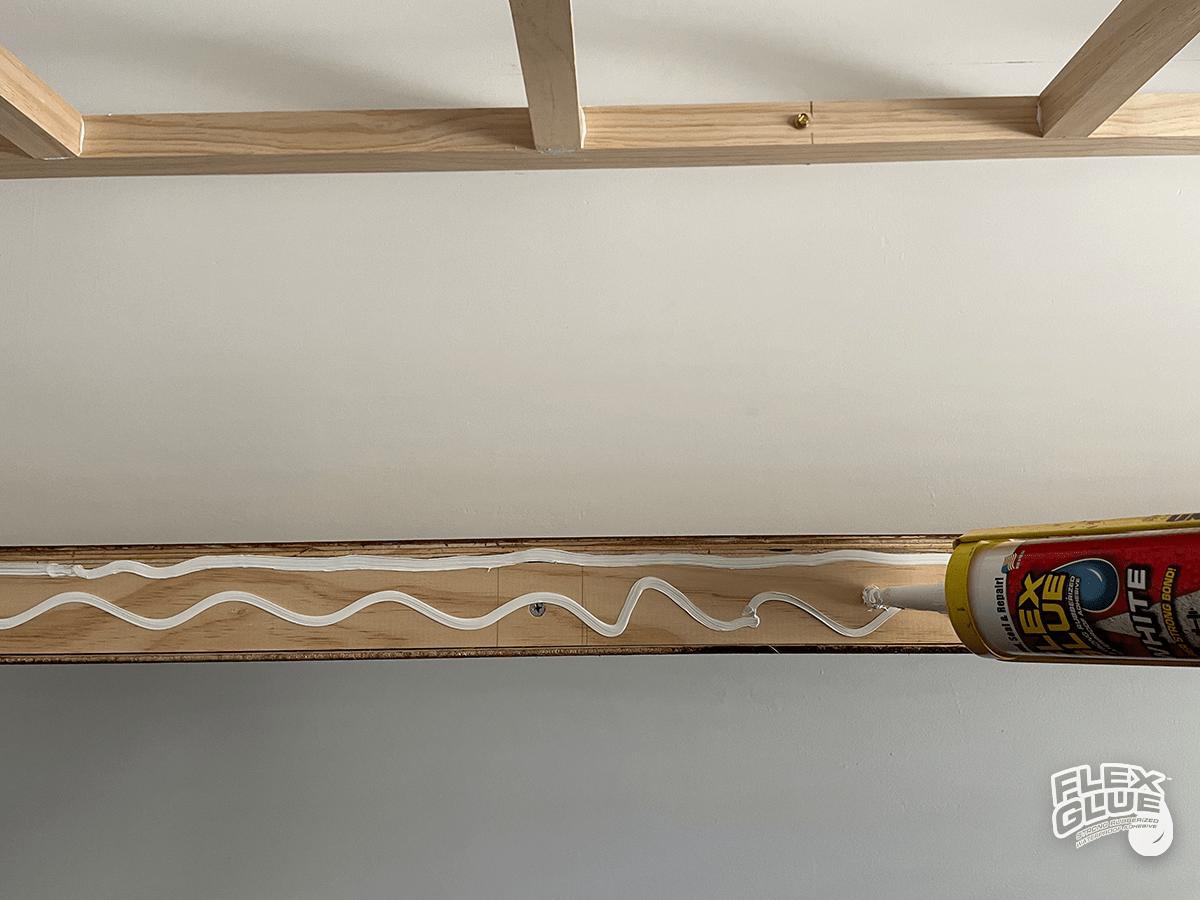
Once your stain is dry, it’s time to attach the plywood framing. Run a generous bead of Flex Glue along the top of each shelf frame.
Flexpert Tip: Only do one shelf at a time as Flex Glue sets within minutes.

Position the thicker top plywood piece and press firmly onto the Flex Glue. Add some finish nails to hold it in place.


Next, run beads of Flex Glue along the bottom of the shelf frame. Position the thinner bottom plywood piece and add finish nails to hold it while the Flex Glue dries.


Lastly, apply Flex Glue to the front and sides of each shelf, position the dressed pine timber in place and add a few finish nails.

I finished my DIY floating wood shelves with a couple of coats of glossy varnish.


5. Style Your Floating Shelves
Now comes the fun part, adding items to your shelves! I built my DIY floating shelves mainly to hold books. I added interest to the shelves by breaking up the expanse of straight lines with the curves of vases and plants. I also added keepsakes such as a vintage typewriter and a small bowl of rocks to create vignettes amongst the books and complete the look. I couldn’t be happier with the results!
Although this project took a little time and elbow grease, it was worth it. Thanks to these beautiful DIY floating wood shelves and Flex Glue, my once plain lounge room looks like a completely new space!

By Kate Hollingsworth
My name is Kate Hollingworth, and I’ve been a serial DIYer for 25 years. I recently turned my love of home renovations into a thriving business where I design and execute entire room overhauls in my clients’ homes. I’m also a content creator on IG @houseofhollingsworth, where I showcase innovative methods to create stunning DIY projects. And I’m an expert when it comes to creative ways to incorporate Flex Seal Products!


