3 Essential DIY Winter Home Repairs
Even the most well-maintained home can face unexpected challenges during the winter months. As temperatures fluctuate, repeated freeze-thaw cycles can put added stress on seals and surfaces around your property, leading to cracks, gaps, and damage. By the time winter is in full swing, these issues may already be taking hold.
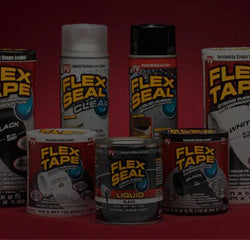
Fortunately, you don’t have to wait for warmer weather to take action. With the Flex Seal Family of Products in your toolkit, mid-winter repairs are both possible and dependable. Designed to perform in cold conditions, these products help you seal, bond, and protect your home when it matters most.
Let’s take a look at three essential winter repairs you can make using Flex Seal Draft & Insulation Tape, Flex Shot, and Flex Tape.
Stop Cold Drafts with Flex Seal Draft & Insulation Tape
Drafts are one of the most common winter issues. Gaps around doors and windows let frigid air sneak in and warm air escape, making your home harder and more expensive to heat. Flex Seal Draft Tape creates a tight seal that helps reduce heat loss while staying firmly in place in cold conditions. It’s ideal for sealing gaps around door frames, window sashes, attic access points, and more.

Here’s how to apply Flex Seal Draft Tape for best results:
1. Prep the Surface
Clean and dry the application surface. For glass or metal, we recommend using a cleaner for best results.
2. Measure and Cut
Measure the length of the gap you’re sealing and cut one strip of Draft Tape at a time to your desired length. It’s best to do a “dry fit” to ensure correct measurement and placement.
3. Peel and Apply
Remove the backing and press the tape firmly into place for 15-30 seconds, making sure it fully compresses against the surface to block airflow.
Flexpert Tip: To remove Flex Seal Draft Tape, peel it slowly and rinse the tape with water to reuse. Let it air dry completely before storing.
Repair Cracks, Holes, and Seams with Flex Shot
Winter weather can expose small areas of damage around your home, especially along window and door trim, siding joints, and gutter connections. Left unaddressed, these minor issues can worsen over time, allowing moisture to seep in and cause further damage.
Flex Shot makes it easy to repair these problem areas, even in cold conditions. This powerful sealant is ideal for filling cracks and holes in trim, sealing gaps along gutter seams, and reinforcing joints where materials meet. Its thick, rubberized formula stays in place without sagging, creating a durable, watertight seal that holds up through freeze-thaw cycles.

Here’s how to make strong, clean repairs with Flex Shot:
1. Clean the Application Surface
Remove dirt, loose debris, or old sealant from the crack or hole. A clean surface helps Flex Shot bond properly and cure evenly.
2. Cut the Nozzle
Flex Shot’s extension tube can be cut to any size to control bead thickness. For best results, cut the tip at a 45-degree angle using a utility knife or razor blade.
3. Apply Flex Shot
Slowly apply a steady bead directly into cracks, holes, or along seams that need reinforcement. No caulking gun is required, giving you precise control as you work.
4. Smooth and Allow to Cure
Use a gloved finger or caulking tool to smooth the surface before it begins to set. Flex Shot begins to form a skin in about 20 minutes and fully cures within 24 hours.
Flexpert Tip: After use, squeeze a small bead to plug and seal the remaining product, and store it within the range of 15.5°C to 37.7°C.
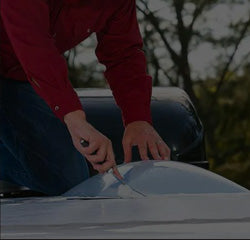
Stop Mid-Winter Leaks Fast with Flex Tape
Leaks can happen at any time of year, even during winter. From dripping gutters to cracked siding, Flex Tape offers an instant waterproof seal that holds strong, even in subzero temperatures. This powerful adhesive provides peace of mind in harsh winter conditions, buying valuable time until permanent repairs can be made.

Follow these steps to make durable, cold-weather repairs with Flex Tape:
1. Clean and Dry the Area
Remove any snow, ice, or debris. For the best bond, ensure the surface is as clean and dry as possible.
2. Cut the Tape to Size
Measure the area you’re repairing and cut a piece of Flex Tape large enough to overlap the edges by at least one inch on all sides. A larger patch means a stronger seal.
3. Peel and Position
Remove the protective backing to expose the adhesive, then carefully place the tape over the damaged area. Once applied, Flex Tape cannot be repositioned, so make sure to line it up carefully.
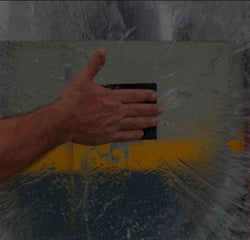
4. Press Firmly and Smooth Out
Apply strong, even pressure across the entire patch to eliminate air pockets and achieve complete contact. Use a roller or squeegee to help smooth it out if necessary.
Flexpert Tip: For optimal adhesion, apply Flex Tape in temperatures above -6.6°C. Once cured, it can withstand temperatures as low as -56.6°C.
When cold weather strikes, the Flex Seal Family of Products can help keep your home sealed and protected. Stock up today to stay ready for DIY winter repairs.