3 Easy DIY Back-to-School Crafts
This "3 Easy DIY Back-to-School Crafts" blog was written by a paid contributor. All photos were taken by Floritere.
Back-to-school season is officially here, and that means back-to-school shopping! As a parent, I know how quickly school shopping costs can add up, so I'm always looking for ways to save money. Instead of buying everything brand new this year, I chose to upcycle a few simple items we already had around the house.
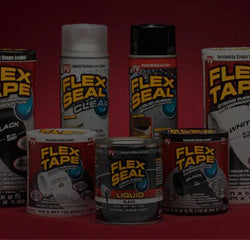
In this blog, I will share three easy and fun projects I did for the back-to-school season using Flex Minis. These portable, powerful, mini-sized Flex Seal products are perfect for smaller crafts and quick repairs.
Keep reading to discover why Flex Minis should be on every parent's back-to-school list!
Note: Before using Flex Seal products, read all directions and take proper safety precautions, such as being in a well-ventilated area and wearing protective gear while applying.
1. DIY Pencil Holder With Flex Seal and Flex Glue Mini

I turned some empty aluminum food cans into beautiful DIY pencil holders for my daughter's desk. This project is extremely simple, but the results are extraordinary!
Materials
• Flex Seal Spray Mini 2oz.
• Flex Glue Mini
• 3 empty aluminum cans
• Painter's tape
• White ink pen
1. Clean and Prep Cans
First, remove any labels, then wash and dry the cans thoroughly. Next, use painter's tape to create stripes. The taped-off parts will not be painted and will remain the colour of the can, so you can get creative on how you choose to space them.
2. Add Colour with Flex Seal Mini
Once the cans are taped off, it's time to coat them with Flex Seal Mini spray in black. Use a sweeping motion and spray 8-12" from the surface until the desired area is covered.
Flexpert Tip: Flex Seal covers the surface quickly, so you won't need to use much spray.
3. Let Dry and Remove Tape
Let the cans dry for about an hour or until the product is completely dry to the touch. Then carefully remove the painter's tape and enjoy the magic of uniform black lines! What I love about Flex Seal spray is that, unlike regular black paint, you will not have to apply any extra varnish to protect the colour.
Flexpert Tip: It's best to wait 24-48 hours for Flex Seal to fully cure before moving on to the next step.
4. Add Details with White Paint
Since Flex Seal spray can be painted over, I added some designs to the cans for a more personalized look. Use a white ink pen, office corrector, or regular white paint to create your artwork. Decorate and let your imagination run wild!
5. Join Cans Together with Flex Glue Mini
Finally, connect the three cans together using Flex Glue Mini. Simply add a line of glue where each of the cans will meet. Then, press them together for 15-30 seconds to activate Flex Glue's super-strong instant grab technology.
Flexpert Tip: Allow 24-48 hours for Flex Glue to cure before using the pencil holder.
And that's how easy it is to make a DIY pencil holder to keep everything well organized during the school year.
2. DIY Bulletin Board With Flex Glue Mini

If you're looking for customizable back-to-school bulletin board ideas, this project is for you! I up-cycled an old, simple cork-board that I had lying around by adding some creative touches to make it more useful.
Materials
• Flex Glue Mini
• Corkboard
• Fabric
• Scissors
• Hammer
• Cardboard tube
• Small cardboard box
Steps
1. Remove Corkboard Frame
Start by removing the frame from the board. I used a hammer to help with this process.
2. Add Fabric
Next, cover the corkboard with the fabric of your choice. Then, apply Flex Glue around the board and adhere the fabric to it.
Flexpert Tip: Make sure to glue and fold any excess fabric.
3. Replace the Frame
Now it's time to put the frame back on. Put a little Flex Glue on it so it is secured, and then use your hammer to help make any adjustments.
4. Add Accessories
This step helps make your DIY bulletin board craft more functional. First, you'll make a pencil holder out of the cardboard tube. Cover the tube with paper and another piece of cardboard, make a lid for the base, and decorate it.
Next, cut the cardboard box at the top, cover it with paper, and decorate it to make a mini file cabinet. Once your accessories are made, attach them to the board with Flex Glue.
Now you have a cute board with everything at hand to write notes, display photos, and store items.
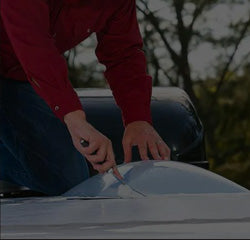
3. Backpack Repair With Flex Tape Mini

A few times each school year, my daughter comes home from school with a ripped or broken backpack. I don't usually realize it until the following morning while I'm racing against the clock getting her ready for school!
Flex Tape is a lifesaver on those busy mornings when there isn't much time to repair her backpack. It also saves me money by fixing the bag instead of replacing it.
Check out how to quickly repair a backpack tear using Flex Tape Mini.
Materials
• Flex Tape Mini, clear
• Scissors
• Hair dryer (optional)
Steps
1. Locate the Area to Be Fixed
This step is simple: find the hole or damage that needs to be repaired.
2. Clean and Prep the Area
Clean the part of the bag where you'll be applying Flex Tape to ensure it is free of dirt or oils.
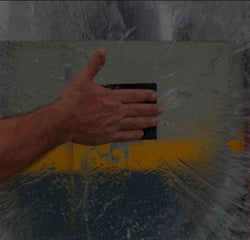
3. Fix It With Flex Tape!
Cut two pieces of Flex Tape bigger than the area you'll need to repair. One piece will go on the outside of the backpack and the other on the inside. Remove the clear backing and place the tape over the hole. Press down firmly and smooth out any air bubbles. Repeat this process for the inside of the bag.
Flexpert Tip: To speed up the bonding process, I used a hair dryer to apply heat to the Flex Tape.
These DIY back-to-school crafts are great examples of how Flex Minis can rescue us this school year by helping keep our little ones' school supplies organized and functional while helping parents save money. I hope you feel inspired to use Flex Minis for your next craft or repair!
By Floritere
Creative content creator for social networks. For more than 10 years, she has been creating, innovating, and sharing ideas. She specializes in all kinds of crafts, mainly in reusing materials with which she brings all kinds of projects to life. You can check out her projects on IG @floriteree .