How To Make a DIY Spice Drawer Organizer
“How To Make a DIY Spice Drawer Organizer” was written by a paid contributor. All photos by Kate Hollingsworth.
I am in the process of a very slow kitchen makeover which I’m doing in my spare time on a tight budget. While a kitchen makeover can seem like a daunting undertaking, I am making it more manageable by breaking it down into small, achievable projects. This week my focus turned to making a DIY spice drawer organizer using some leftover timber and Flex Super Glue Gel.
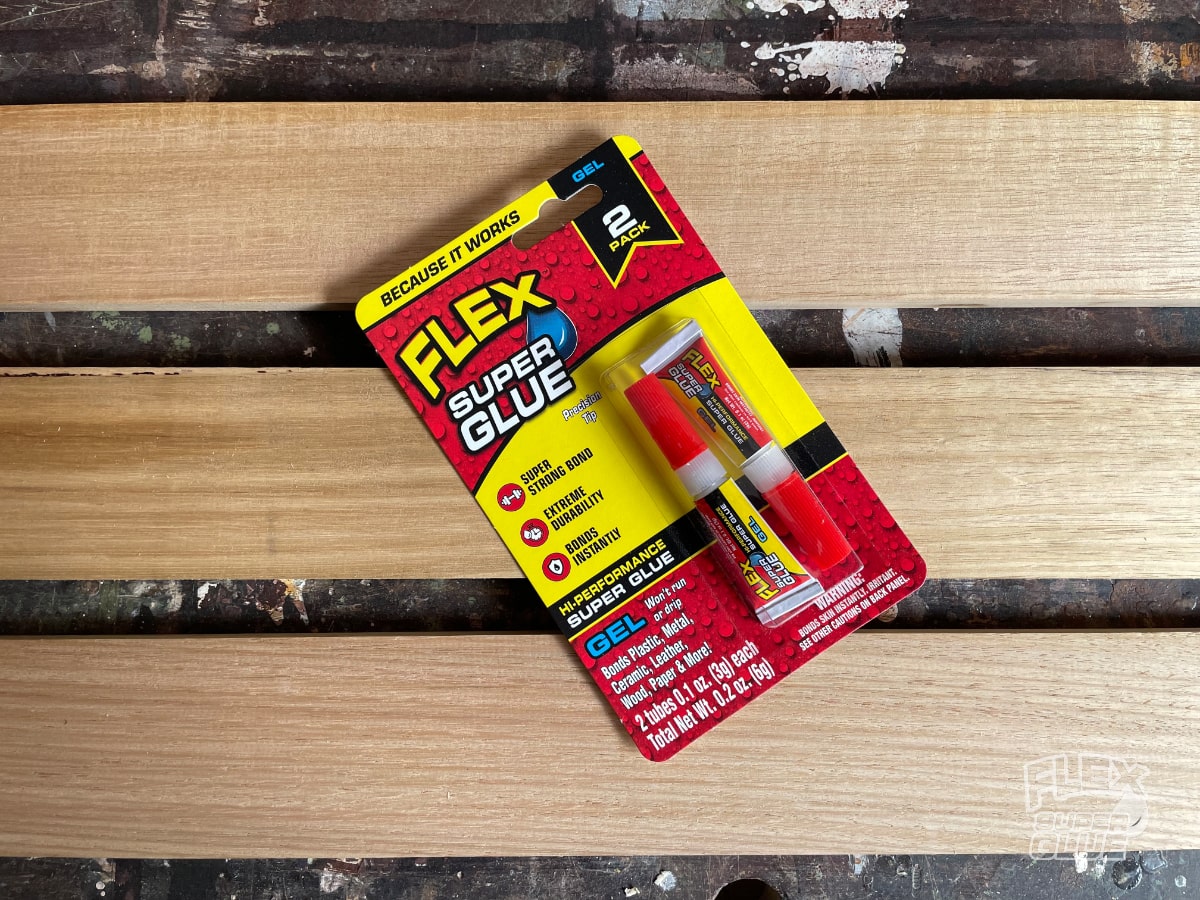
I love Flex Super Glue because it’s so easy to use - it grabs hold within seconds and adheres to almost anything, including plastic, metal, ceramic, wood, and more! Once dry, it gives the strong bond my projects need. Keep reading for a step-by-step tutorial on how to make your own DIY spice drawer!
Materials
● Flex Super Glue Gel 2-pack
● 2.4m x 65mm x 12mm timber (1 board)
● 2.4m x 30mm x 18mm timber (1 board)
● Sandpaper
● Varnish
● Stain (optional)
Note: Use caution when working with power tools and always follow the manufacturer’s instructions. Before using Flex Super Glue, make sure to read all directions carefully. When using Flex Super Glue Gel, make sure to shake the gel down towards the applicator tip before applying.
Steps
1. Cut Timber

Measure the width of the inside of your chosen drawer and cut the timber to that width (minus 1 mm to make it easier to insert in the drawer). You’ll need to cut one piece of 65mm timber and one piece of 30mm timber for each riser. I made 4 risers for my drawer and left some open space at the back of the drawer for spare seasoning packets and miscellaneous items.
Flexpert Tip: If your boards have any rough edges or areas, you can smooth them out with sandpaper.
2. Build Shelves Using Flex Super Glue

Wearing gloves, take your Flex Super Glue bottle and shake it so the product moves down towards the applicator tip, then add a few dots of product along one side of the 65mm timber. Next, take your 30mm timber piece and press it against the glued edge. Hold in place firmly for 30 seconds and leave it to cure for at least one hour.

Repeat this process and glue each of the remaining spice drawer inserts.
3. Add Stain and Varnish

I wanted my spice rack to match the dark timber I already had in my kitchen, so I chose to stain the drawer inserts a dark walnut color. Then I sealed them with a coat of varnish. If you like the color of the timber you’re using, you can skip the staining.
Flexpert Tip: Allow the stain/varnish to dry completely before moving on to the next step.

4. Place Shelves Into Drawer

Place your spice drawer inserts in the drawer with the long side facing you and the short side at the back. They don’t need to be fixed in place at all as they sit in the drawer without moving around.


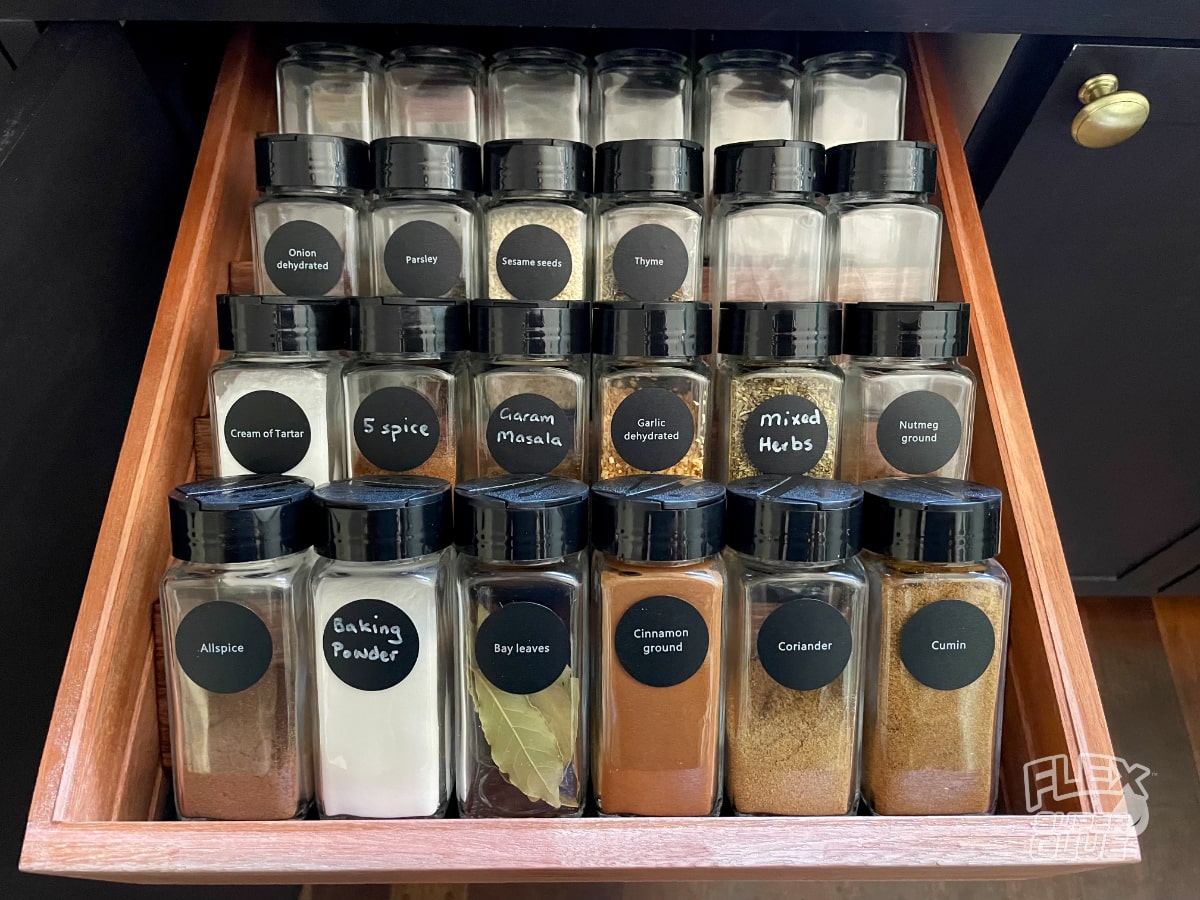
5. Add Spice Jars to Shelves

This step was the most fun for me! Take your spice jars and add them to each insert. I treated myself to a set of matching spice jars, and I couldn't be happier with the result.
My spice drawer is both gorgeous and functional. I love that I can now see and reach each jar clearly. This organizational project is definitely one of my all-time favorites!
By Kate Hollingsworth
Based in Perth, Australia, Kate is a self-taught interior specialist with over 20 years of DIY knowledge. She’s also a Content Creator on IG, where she shares tutorials, before and afters, and easy-to-follow stories empowering women to attempt home DIYs.
HOW TO USE OUR PRODUCTS


CRAFTS & DIY PROJECTS


- Choosing a selection results in a full page refresh.